A photo workflow for location scouting, from camera roll to scout report
After a week of scouting, the camera roll is a thousand shots of thirty streets. The work that follows is always the same: work out which shots belong to which place, name the places, pick the frames worth showing, note what the photos can't show, and get it all to the director in a form they will actually open.
This guide walks through that workflow on a Windows PC, step by step. It uses Location Sorter, which was built for exactly this job, but the order of the steps holds whatever tools you use.
1. Shoot so the photos know where they are
Everything below depends on each shot carrying its GPS position, which phones add when the camera may use location. On an iPhone, check Settings → Privacy & Security → Location Services → Camera. An iPhone also records which way it was pointing and how it was tilted, which matters later for checking the light.
Two habits help:
- Take a wide establishing frame at every place, even if it isn't pretty. It is the frame that tells you, months later, which street this was.
- Keep each job in its own folder when you copy the shots off the phone. One job, one folder of shots, makes everything after this simpler.
2. Group the shots by place
Open the job's folder in Location Sorter with Sort a folder of shots…. It reads the position in every photo and clip and groups the shots that were taken close together into places, each named from the map: a street, a square, a landmark.
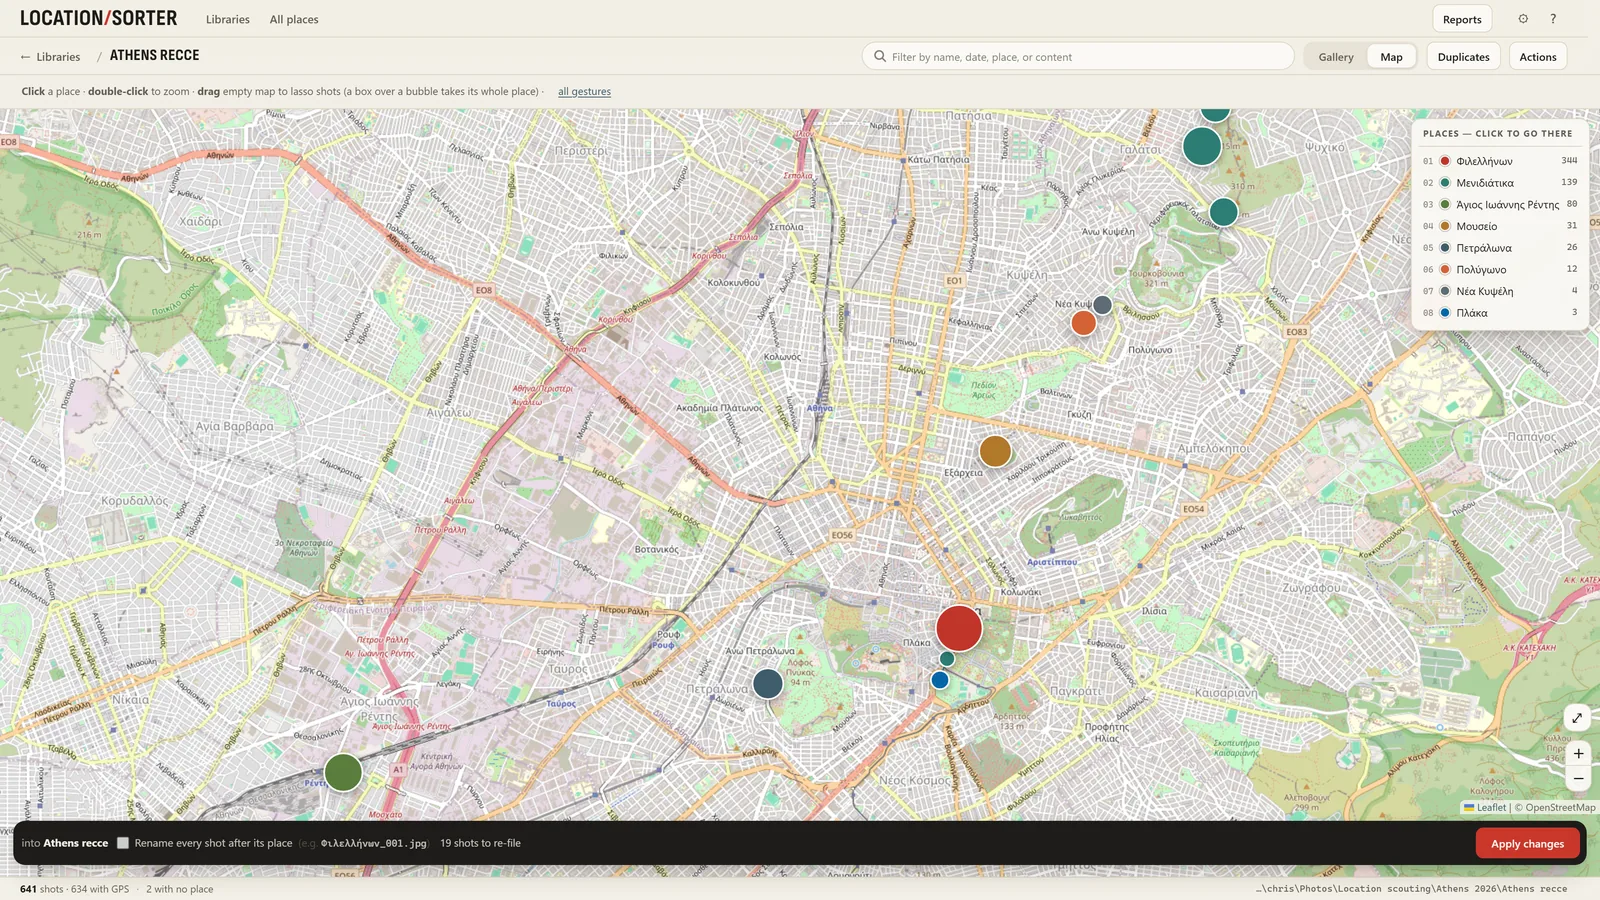
Check the groups on the map. Two neighbouring places that are really one location can be merged by moving shots across; the four interior frames that ended up with the street outside can be split off into a place of their own with New place…. Shots with no position (screenshots, photos from a camera without GPS) wait under No place until you give them one.
3. Name places the way the production will talk about them
The map's name is a starting point. Rename each place to what the team will call it: "Corner café, Plaka", "Rooftop with Acropolis view", "Garage, Petralona". Those names become the folder names and the headings in the report.
4. Write down what the photos can't show
A photograph won't tell anyone that the street can't be closed, there's no power on the roof, or it gets loud after six. Give each place tags for the facts you'll want to search for later (interior, permission-hard, no-power) and a note for the sentences.
Use the same tag spelling on every job. The app suggests tags you've already used in any library on the machine, so no-power stays no-power across years of work, and a search for it finds every place you ever tagged.
5. Star the frames that matter, drop the re-takes
You keep five of every fifty frames, and you know which. Star them: starred shots lead their place, and the first star becomes the place's cover in the report.
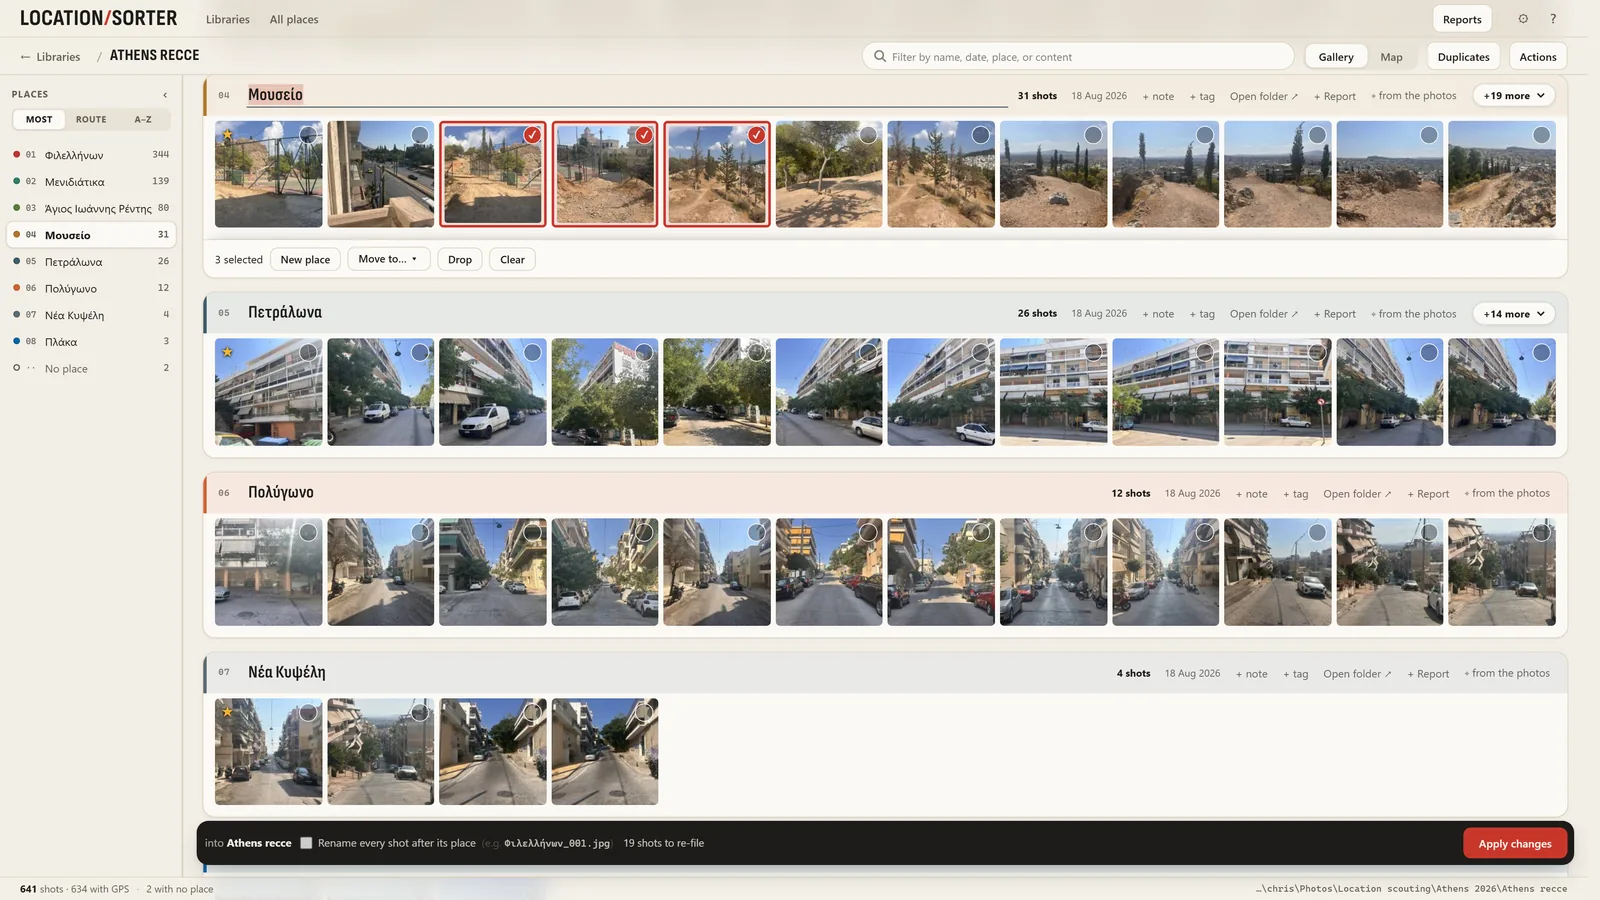
Then let the app deal with the five near-identical frames of the same wall. Duplicates finds runs of re-takes and offers to keep one and drop the rest. Nothing is deleted: dropped shots are just left out of the sort.
6. Check the light before anyone asks
The first question about a location is usually what time is the light right? Open any shot full size and a line under it says what the sun is doing in that frame ("shooting into the sun, backlit, flare likely", "golden hour"), with sunrise and sunset. Press S to draw the sun's path for that day, the solstices and the equinox into the frame. Our guide to seeing where the sun will be from a photo covers it in detail.
7. Apply, then write the report
Nothing has moved on disk yet. Press Sort: the preview shows every folder about to be created and how many shots go in each, then Apply files them.
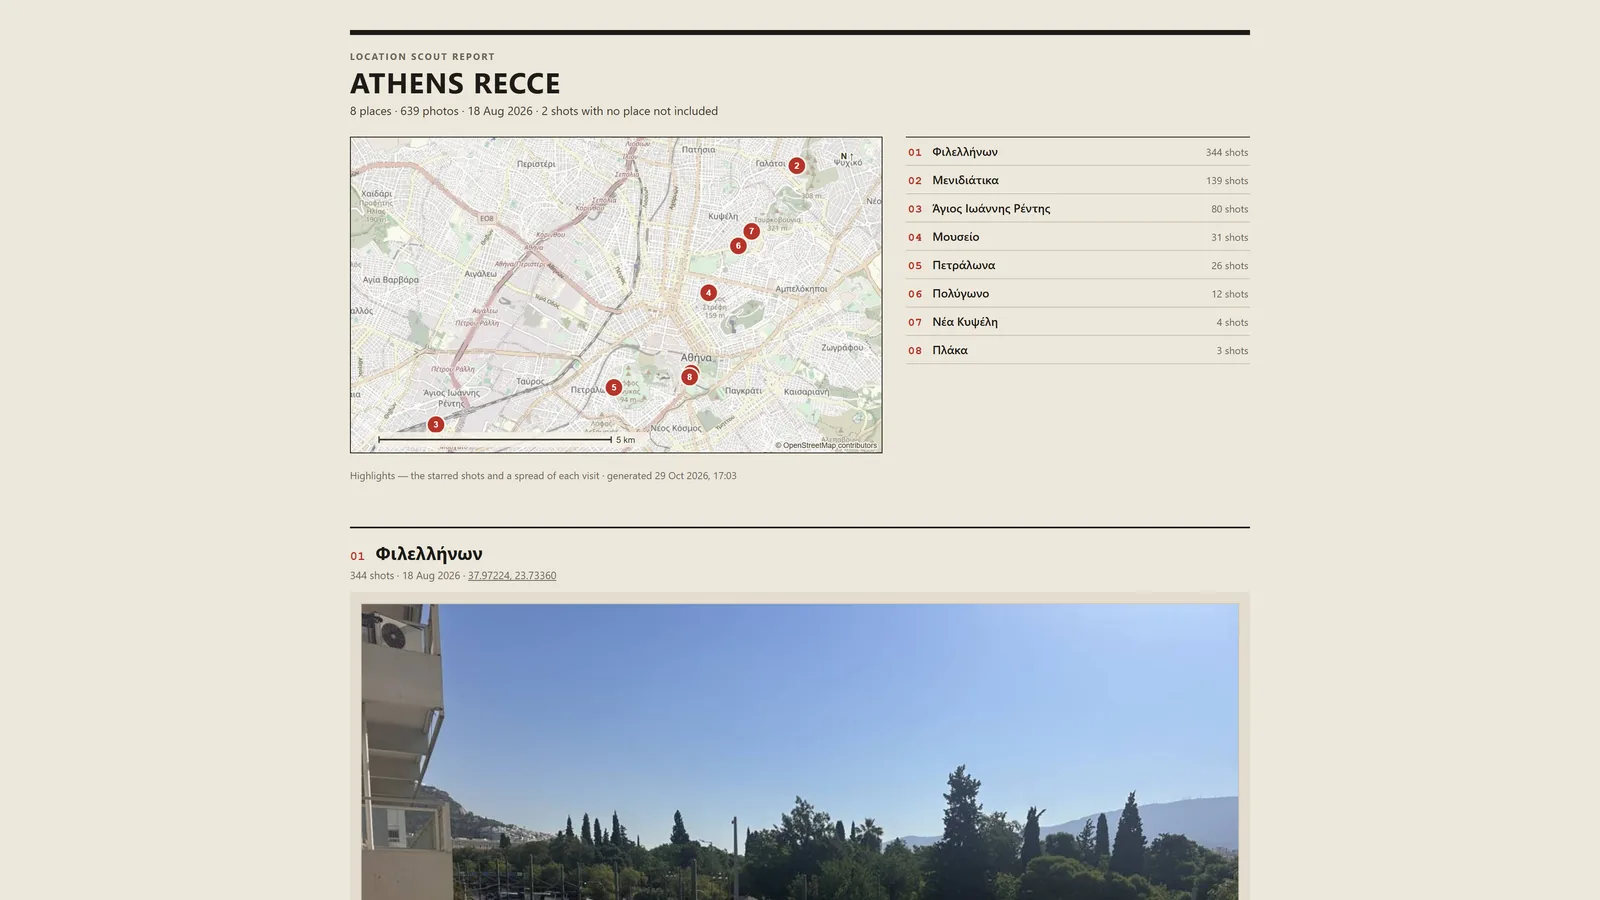
Then Actions → Scout report…. Untick the dead ends, choose Highlights (twelve frames a place) or Every shot, and write it. The report is a single HTML file with the images inside it, so it emails cleanly and opens offline on any computer, with no app to install. It opens with a cover map of every place and an index, then gives each place a page: its starred shot large, your tags and note, its dates and coordinates, and a spread of the visit.
8. Next month: find it again
Every job you sort stays on the Libraries screen, and the search there covers all of them: place names, your notes and tags, dates, and what is actually in the pictures. When a brief asks for a 1970s garage, type garage and see every one you've shot, across every job.
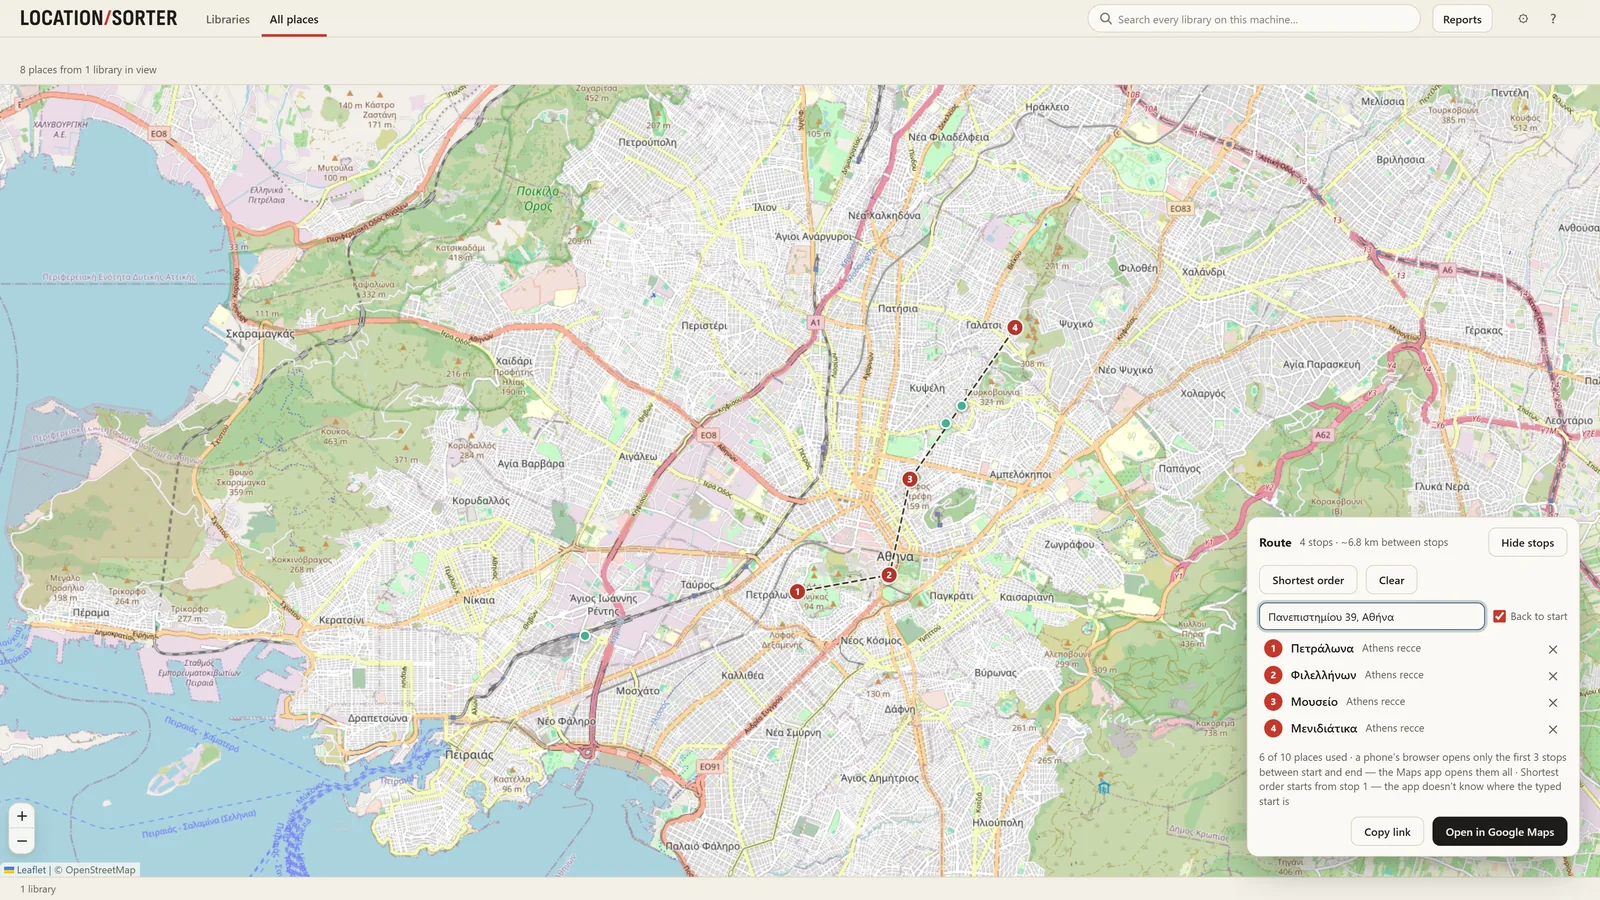
From the results you can build a report from several jobs, with scene headings and a line under each option saying why it fits the brief, or put the places on a recce route and open it in Google Maps for real driving times.
Location Sorter runs on your PC, with no account and no upload. It's free to try for 7 days from the Microsoft Store, then €24.99, once.